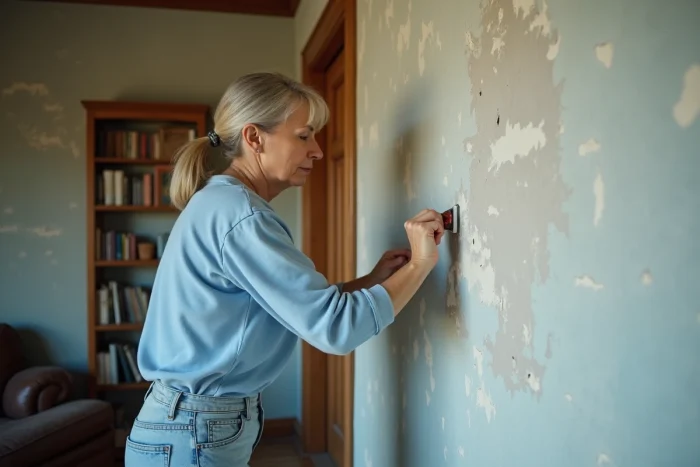
At first glance, repainting a damaged wall may seem trivial; however, the reality is much more demanding. Forget the idea that a simple coat will erase years or everyday accidents: the success of a renovation primarily depends on choosing the right paint, suited to the situation.
An ordinary paint, even high-end, often only highlights the small flaws of a marked surface. Microcracks, subtle reliefs, or roughness come through several layers, revealing the wall’s history. Certain formulations, enriched with thick resins or mineral fillers, rise to the challenge: they fill, smooth, and diminish what others leave visible.
There are other criteria to consider: resistance to moisture, ease of application with a roller, ability to accept spot repairs… Paints designed for renovation rely on these advantages. Here, color or appearance often takes a back seat to the nature and extent of the flaws to be concealed. Adapting the product to the problem is what makes the difference.
Damaged walls: understanding flaws to better conceal them
Before opening a can of paint, you need to scrutinize the wall. Every crack, impact, flaking area, or trace of moisture tells a very specific story. There’s no point in masking a problem without addressing its cause; infiltrations, mold, or structural defects will always resurface. Careful preparation is essential: cleaning, scraping off the old coating, treating for moisture if necessary.
For marked irregularities, filler tackles deep holes and cracks. The smoothing compound, on the other hand, evens out the overall surface. Sometimes, certain flaws persist despite all these efforts. At this stage, there are several solutions to dress the wall and start afresh:
- glass cloth,
- renovation veil,
- or plasterboard,
These alternatives provide a second skin to the surface, ready to receive the color of your choice. To know which paint for a damaged wall to choose, it will depend on the new surface, the room in question, and how you experience the space. And if the desire to turn a flaw into an asset tempts you, decorative coatings or paneling can transform irregularities into character, giving a strong identity to the room while meeting renovation needs.
Which paints really make a difference on imperfections?
For imperfect walls, matte paint remains the reference. Its velvety appearance absorbs light, smooths out relief, and diminishes the flaws of the surface. Ideal in living spaces where softness and sobriety are sought: bedrooms, living rooms, hallways. Choosing a glossy option is playing with fire: it reflects light, highlights every irregularity, and forgives nothing. It should be reserved for perfectly prepared walls.
Acrylic paint, water-based, adapts to many contexts. Easy to apply, quick-drying, low-odor: it finds its place in all rooms, including those exposed to moisture, such as kitchens or bathrooms. Surfaces covered with glass cloth or renovation veil welcome it without difficulty, as these coatings act as a buffer against microcracks.
In rooms highly exposed to water or stains, oil-based paint stands out. Its opacity and durability make it suitable for kitchens, bathrooms, or laundry rooms, even if its drying time requires a bit of patience. Alkyd paint, a hybrid between acrylic and oil-based, combines robustness and ease of maintenance, ideal for high-traffic areas or wet rooms.
Never neglect the primer: suited to the surface, it ensures better adhesion and contributes to the final finish. The choice of finish, matte, velvety, or satin, should take into account the type of room and the nature of the flaws to conceal. This detail will make the difference between a simply repainted wall and a truly transformed space.

Tips and tricks for stunning results, even without being a pro
Preparing the surface is the first step towards a successful result. Start by inspecting the wall: cracks, moisture, peeling paint, or suspicious marks must be identified. Protect the floor and furniture with a tarp, then proceed to dusting and cleaning: these actions condition the good adherence of the paint.
To fill large holes or deep cracks, apply a filler. Finer irregularities are treated with a smoothing compound, which gives the wall a more uniform surface. A light sanding after drying finishes preparing the ground. If, despite everything, flaws persist, glass cloth or renovation veil can save the day: they mask microcracks and provide a surface ready to paint.
Adapt your tools to your project: for textured or irregular surfaces, a medium-pile roller is very suitable. Angled brushes allow you to reach corners and ensure finishes. Don’t forget protective equipment: mask, gloves, goggles, nothing should be left to chance. Finally, strictly adhere to the drying times between each coat: this is the guarantee of a durable and neat result.
The technique makes all the difference. Apply the paint consistently, without overloading: this is the best way to achieve a professional finish, even if you’re a beginner. When the wall is really too damaged, or if the investment is significant, consulting a building specialist remains a solution to consider seriously.
A renovated wall not only erases flaws: it changes the light, alters the atmosphere, and breathes new life into the room. With every passage through this newly clad space, a bit of pride in the work accomplished invites itself into your daily life.